Veined wet room with pebble floor
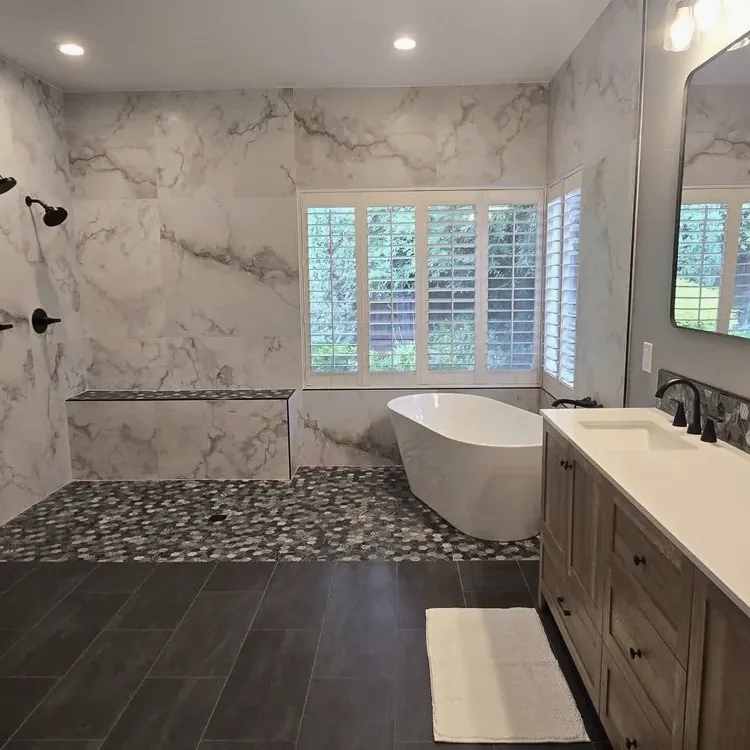
| Room | Bathroom |
|---|---|
| Tile | Light veined wall tile and dark pebble-look mosaic |
| Layout | Large-format wall tile and irregular mosaic floor |
| Area | Ask us |
Tile work planned around the building, access and daily use.
A commercial tile installation begins with a site conversation, not a tile box. We look at the room, the business hours, the expected foot traffic, the route for deliveries, adjacent finishes, and the point where customers or staff need to keep moving. A restaurant, office, retail room, medical suite, lobby, and multifamily common area each put different demands on the same material. The first scope records what is known and flags what needs an opening, test, measurement, or decision before demolition.
Existing drawings are useful, but the floor in front of us is the controlling condition. We check transitions, drains, door clearances, base conditions, cracks, hollow areas, paint, adhesive, moisture, and changes in plane. If the substrate cannot support a sound installation, tile is not the fix by itself. We describe the corrective work separately so the written scope distinguishes removal, preparation, tile setting, grout, sealant, and return-to-use work. That makes the sequence easier for a facilities contact or general contractor to review.
Coastal humidity and salt air deserve attention without being treated as an automatic slab defect. Salt-laden air can affect exposed metal, exterior transitions, and cleaning routines, but a sound interior concrete slab is evaluated by its actual condition. We focus on bond, movement, moisture, and drainage. A room that is near the coast may need more deliberate detailing at thresholds and wet areas, yet the answer still comes from inspection rather than a blanket material claim.
Removal is controlled around walls, millwork, storefronts, equipment, and occupied areas. We protect the path in and out, separate debris from the active work zone, and expose enough substrate to see whether the proposed assembly is realistic. After removal, the surface is cleaned of weak material and checked for plane, bond, cracks, joints, and height. Local leveling can correct a measured low spot; it is not a substitute for rebuilding a failed base. High spots are addressed before they become lippage or a door problem.
Where movement or shrinkage cracking is a concern, the assembly may call for a crack-isolation membrane selected for the substrate and the manufacturer’s instructions. Membranes do not make a moving structure still, and they do not replace structural repair. In showers and other wet areas, waterproofing is a continuous system with compatible corners, seams, penetrations, drains, and changes of plane. Cement board is not automatically waterproof, and a foam board is not automatically correct; the system has to be installed as designed and sealed at its required joints.
A flood test is used where the shower or wet-area design requires one, before tile hides the pan and its connections. The test is planned around access and cure requirements, with the result recorded before setting begins. Commercial schedules often make this step tempting to skip. That is exactly why it belongs in the sequence: a short hold point can prevent opening a finished wall to find a leak later.
We establish control lines from the room, not from the first wall that looks straight. The layout accounts for tile size, grout joint, focal entries, drains, columns, casework, door openings, and transitions to other flooring. A balanced cut is usually more convincing than a full tile disappearing at one side, but balance must be weighed against accessibility, equipment, and the direction people see when they enter. Before setting, the pattern and the key cuts are reviewed against the field conditions.
Large-format tile adds its own checks. The substrate needs the required flatness for the tile and pattern, and the setting bed has to support the back without leaving voids that can lead to cracks or broken corners. We use the specified thinset and mixing, open-time, and coverage practices for the product. Coverage is checked during the work rather than assumed from a notched-trowel label. Back-buttering may be needed to improve contact on larger tile or textured backs. The aim is a supported installation, not a decorative skin over gaps.
Movement joints are planned at the perimeter and at required changes or breaks in the field. They allow the assembly to accommodate expected movement and should not be filled with rigid grout where a flexible sealant or designed joint is required. We keep grout joints consistent within the tile tolerances and watch for lippage under the actual light. A straight line on a drawing still has to remain straight around penetrations, transitions, and the parts of the room people touch.
The work plan separates demolition, preparation, membrane or waterproofing, setting, grout, sealant, cleanup, and inspection. For an open commercial floor, that can mean divided zones and protected paths. For a restroom or shower room, it can mean coordinating plumbing, partitions, accessories, and the flood-test hold point. For a storefront or occupied office, it can mean smaller releases rather than one large blocked area. We state typical working-day ranges as planning guidance only; substrate discoveries, material availability, inspections, access, and cure conditions can change the sequence.
Thinset needs the right bed thickness, coverage, and working time for the tile and conditions. Tile is placed with the agreed joint and checked for plane, alignment, coverage, and clean joints as the field advances. We avoid relying on grout to correct a poor layout or on extra adhesive to compensate for a substrate that should have been leveled. Cuts at doorways, drains, corners, and penetrations are measured in place and kept serviceable for the trades that follow.
Grout fills joints; it is not waterproofing. In wet areas, waterproofing is behind the tile and flexible sealant belongs at changes of plane and selected movement locations. Grout color and texture are chosen for the maintenance brief, while the installation still follows the product limits. Sealing, when the selected grout or stone requires it, happens after the grout has cured sufficiently and the surface is clean and dry. Sealant and grout are inspected as different parts of the closeout.
The written estimate separates the five core parts below and identifies exclusions or owner-supplied decisions. Exact products are confirmed for the project rather than assumed from a generic commercial label.
Closeout is a walk of the installed work, not just a broom. We check transitions, edges, grout consistency, sealant at the specified locations, exposed cuts, drains, fixture clearances, and areas that need another clean. On a wet installation, we confirm the waterproofing and flood-test steps were completed before concealment and review the visible finish after cure. If another trade still needs access, the handoff is written around what is complete and what remains protected.
Maintenance starts with the material and the building’s cleaning routine. We explain cure restrictions, when light use is appropriate, what should not be scrubbed too soon, and which joints are grout versus flexible sealant. A neutral cleaner and routine inspection are generally more useful than aggressive chemicals, but the tile, grout, and sealer manufacturer’s instructions control. The goal is a floor or wall that can be maintained without treating every coastal condition as a failure.
A commercial request can begin with a call, photographs, or an occupied-site visit. We clarify the room, approximate area, tile, substrate, access, schedule constraints, and decision maker. Then we provide a scope that identifies preparation and finish work separately, confirm the material and layout, coordinate the sequence, install in controlled stages, and review the result. If the site needs a different trade or a structural decision before tile, we say so rather than hide it inside a tile allowance.
| Preparation | Protect access, remove weak or conflicting material as scoped, clean the substrate, check plane and bond, and address localized leveling or repair conditions before setting. |
|---|---|
| Membrane | Install the specified crack-isolation or waterproofing system where the assembly requires it, including compatible seams, corners, penetrations, and drain details. |
| Setting | Lay out the field, mix and apply the specified thinset, achieve appropriate coverage, back-butter when required, and set tile with planned joints, cuts, and movement provisions. |
| Grout | Clean and fill the specified joints after cure and inspection, keeping flexible changes of plane and movement locations separate from rigid grout. |
| Sealing | Apply sealer or compatible sealant only where the selected grout, stone, perimeter, or wet-area detail calls for it, after the surface is ready. |
Typical days for each job. Your written estimate gives your dates.
These are typical medium-size working-day allowances, not promised dates. Curing, weekends and other waits may add elapsed time.
| Job | Stage | Working days |
|---|---|---|
| Kitchen backsplash | Prep and protect | 0.5 |
| Set tile | 1 | |
| Grout and caulk | 0.5 | |
| Seal after grout cures | 0.5 | |
| Bathroom floor | Remove old tile | 1 |
| Level and prep | 1 | |
| Set tile | 1 | |
| Grout | 1 | |
| Shower walls and pan | Demolition | 1 |
| Pan, curb and waterproofing | 1–2 | |
| Flood test | 1 | |
| Set tile | 2–3 | |
| Grout and seal | 1 | |
| Full bathroom | Demolition | 1–2 |
| Prep and waterproofing | 2 | |
| Flood test | 1 | |
| Set walls and floor | 3–4 | |
| Grout and seal | 1–2 | |
| Large open floor | Remove old flooring | 1–2 |
| Level and prep | 1–2 | |
| Set tile | 3–4 | |
| Grout | 1–2 |
The kitchen is typically usable from about day 2, before a later seal visit. A bathroom floor may be walked on about one more day after grouting; showering typically follows about three days after grouting, once cured. Light foot traffic on set floor areas may be possible after 24 hours. Confirm each return to use with the installer.
Sand: shorter path. Outline: longer path.
Scroll the days to see the full scale.
Working days only; curing and weekends add elapsed time.
Ask about these dates| Room | Bathroom |
|---|---|
| Tile | Light veined wall tile and dark pebble-look mosaic |
| Layout | Large-format wall tile and irregular mosaic floor |
| Area | Ask us |
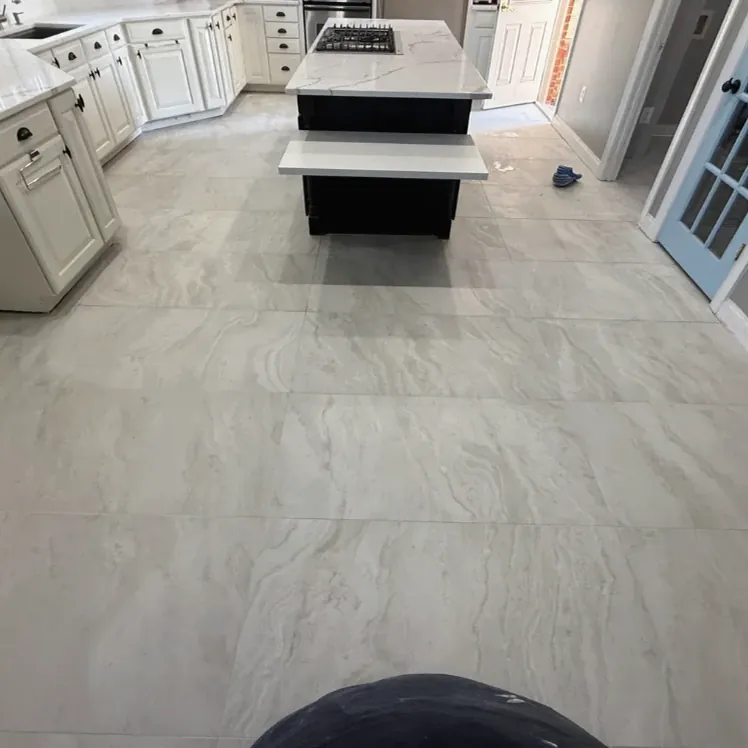
| Room | Floor |
|---|---|
| Tile | Light veined large-format floor tile |
| Layout | Straight grid |
| Area | Ask us |
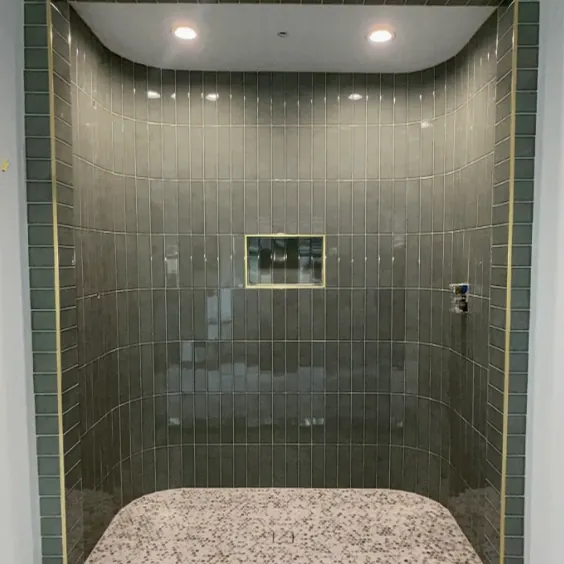
| Room | Shower |
|---|---|
| Tile | Green rectangular wall tile and light pebble-look floor mosaic |
| Layout | Vertical stacked rectangles and pebble-look mosaic |
| Area | Ask us |
Sometimes. The plan may divide the work into zones, protect a route, or schedule disruptive steps outside operating hours. Access, dust control, cure time, and the type of business determine whether phased work is practical.
Only when the existing surface is a suitable, well-bonded substrate and the added height, transitions, doors, and assembly requirements work. We inspect and scope preparation instead of assuming overlay is acceptable.
No. Cement board can be part of a wet-area assembly, but waterproofing still requires the specified membrane, seams, corners, penetrations, and drain treatment installed as a compatible system.
A flood test checks the pan and drain connections before tile conceals them. Where the shower design requires it, the test is a useful hold point before setting begins.
Use depends on the grout, thinset, temperature, humidity, traffic, and manufacturer instructions. We give the project-specific cure and protection guidance at closeout rather than promise one universal interval.